How to Upload an Official Transcript When I Cant Save It

The transcribe feature converts oral communication to a text transcript with each speaker individually separated. After your chat, interview, or meeting, you can revisit parts of the recording by playing back the timestamped audio and edit the transcription to make corrections. You can salvage the full transcript as a Word document or insert snippets of it into existing documents.
You can transcribe spoken language in two ways:
-
Record straight in Give-and-take
-
Upload an audio file
Note:You can transcribe upward to 300 minutes of spoken language content per month.
You can record directly in Word for web while taking notes in the canvas and then transcribe the recording. Word transcribes in the groundwork as you record; y'all won't see text on the page every bit you lot would when dictating. You'll come across the transcript later on you salve and transcribe the recording.
-
Make sure y'all're signed in to Microsoft 365, using the new Microsoft Edge or Chrome.
-
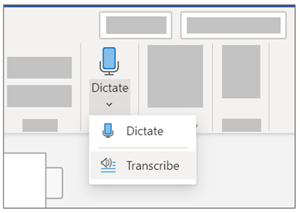
Go toDwelling house >Dictate dropdown > Transcribe.
-
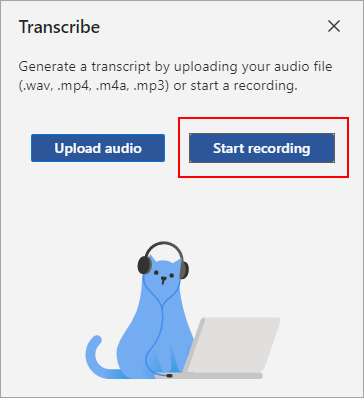
In the Transcribe pane, select Start recording.
-
If it's your offset time transcribing, requite the browser permission to use your mic. There might be a dialog that pops up in the browser or you may have to get to the browser settings.
-
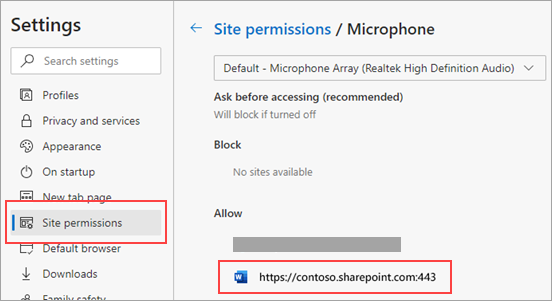
In the new Microsoft Edge: … > Settings > Site permissions > Microphone > Allow "https://[your company URL]...sharepoint.com"
-
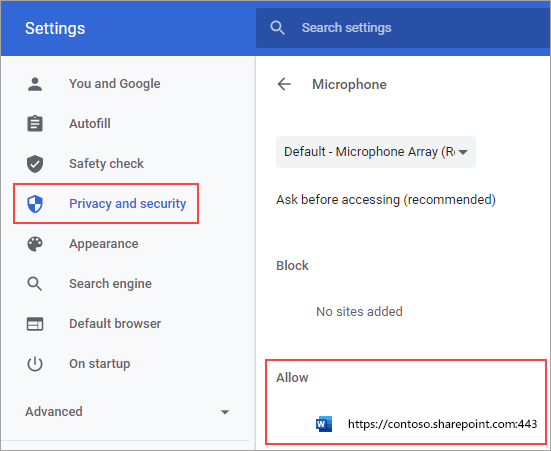
In Chrome: … > Settings > Privacy and security > Site settings > Microphone > Allow "https://[your visitor URL]...sharepoint.com"
Tips:
-
Be careful to set the right microphone input on your device, otherwise results may be disappointing. For case, if your computer's microphone input is gear up to your headset mic based on the last fourth dimension yous used it, it won't work well for picking upwardly an in-person meeting.
-
If you want to record and transcribe a virtual call, don't use your headset. That style, the recording can option upwardly the sound coming out of your device.
-
-
-
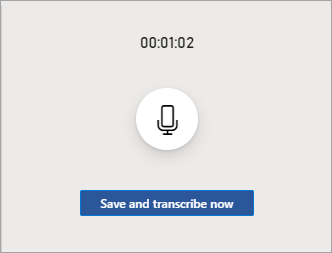
Wait for the pause icon to exist outlined in blue and the timestamp to beginning incrementing to let you know that recording has begun.
-
Showtime talking or begin a conversation with some other person. Speak conspicuously.
-
Leave the Transcribe pane open while recording.
-
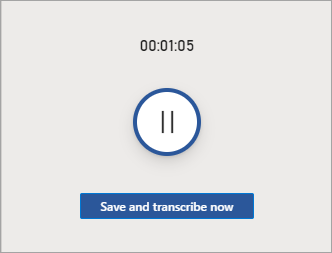
Pause recording by selecting the pause icon.
Resume recording by selecting the microphone icon.
-
When finished, selectRelieve and transcribe now to salve your recording to OneDrive and start the transcription procedure.
-
Transcription may take a while depending on your net speed. Keep the Transcribepane open while the transcription is beingness made. Feel free to do other piece of work or switch browser tabs or applications and come back later.
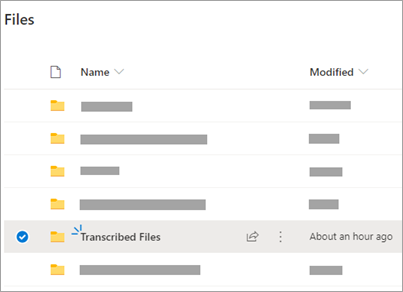
Please notation: The recordings will be stored in the Transcribed Files folder on OneDrive. You lot can delete them at that place. Learn more most privacy at Microsoft.
You can upload a pre-recorded sound file and then transcribe the recording. At this time, you lot're express to five hours of transcription fourth dimension per month for uploaded recordings.
-
Brand sure you're signed in to Microsoft 365, using the new Microsoft Edge or Chrome.
-
Go toHome >Dictate dropdown > Transcribe.
-
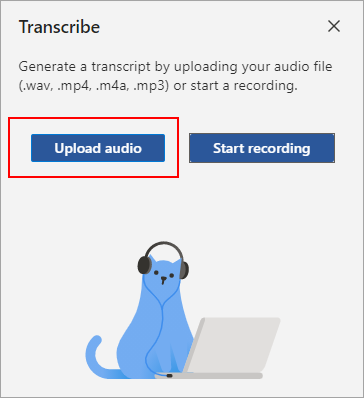
In the Transcribe pane, select Upload audio.
-
Cull an sound file from the file picker. Transcribe currently supports .wav, .mp4, .m4a, .mp3 formats.
-
Transcription may accept a while depending on your cyberspace speed, upward to almost the length of the audio file. Be sure to keep the Transcribepane open while the transcription is happening, simply feel free to practise other work or switch browser tabs or applications and come back afterwards.
Interact with the transcript
Your transcript is associated with the document it'south fastened to until you remove it. If you close and reopen the pane or close and reopen the document, the transcript remains saved with the document.
You can interact with the transcript in a few different ways.
Access the audio file
The sound file, whether recorded or uploaded, is saved to the Transcribed Files folder in OneDrive.
Play back the audio
Apply the controls at the top of the Transcribe pane to play dorsum your audio. The relevant transcript section highlights as it plays.
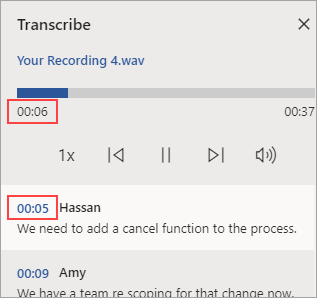
-
Select the timestamp of any transcript department to play that portion of audio.
-
Modify the playback speed upwards to 2x.
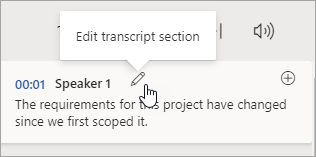
Relabel a speaker or edit a department
The transcription service identifies and separates dissimilar speakers and labels them "Speaker ane," "Speaker 2," etc. Y'all can edit the speaker characterization and change all occurrences of it to something else. You lot can too edit the content of a section to right any issues in transcription.
-
In the Transcribe pane, hover over a section yous want to edit.
-
Select theEdit transcript department icon.
-
Edit the content or change the label. To change all instances of a characterization, select Modify all Speaker [x].
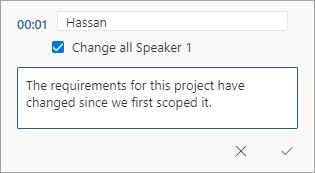
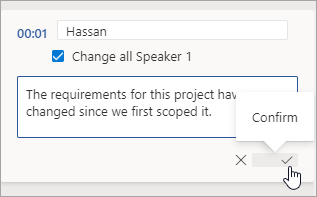
-
To save your changes, select theConfirm icon.
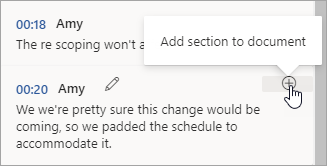
Add a transcript to the document
Different Dictate, Transcribe doesn't automatically add the sound to the certificate. Instead, from the Transcribe pane, you lot can add the unabridged transcript, or specific sections of it, to the certificate.
-
To add a specific transcript section, hover over the section and select the Add section to document icon.
-
To add the entire transcript to the document, select Add all to document.

-
To delete the transcript or create a new i, select New transcription. You can merely store ane transcript per document; if you create a new transcript for the certificate, the electric current transcript will be deleted. However, any transcript sections y'all've added to the certificate remain in the document, but non in the Transcribe pane.
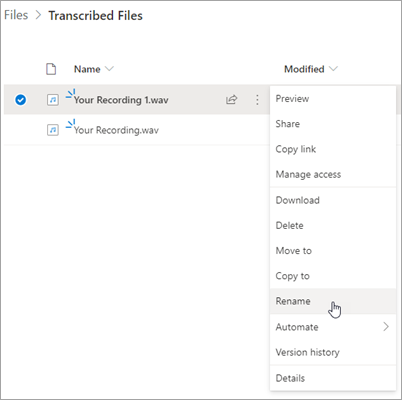
Rename a recorded sound file
You can rename an audio file that has been recorded.
-
Go to the Transcribed Filesfolder in OneDrive, or at the acme of the Transcribe pane, click the name of the recording. When the audio thespian interface appears, close information technology to return to the Transcribed Files folder.
-
Find your recording, and so select Actions > Renameand rename the recording file.
Annotation:The Transcribed Files folder looks unlike depending on whether your OneDrive account is for a concern or personal.
-
Close the Transcribe pane in Give-and-take and then reopen it to run across the name update.
Sharing the transcript and recording
You can share the transcript with someone in two ways:
-
Select theAdd all to documentbutton to add the entire transcript to your document, and then share the Discussion document every bit usual. The transcript volition appear as regular text in the document and there will be a hyperlink to the audio file in the document.
-
Share the Word document as usual. The recipient can open up theTranscribepane to interact with the transcript. To protect your privacy, playback of the audio file is past default non bachelor in theTranscribepane for anyone that you share the Word document with.
You lot can likewise share the transcript and enable playback of the audio file in the Transcribepane:
-
On your version of the Word document, click the filename at the top of theTranscribepane to go to where the audio file is saved in OneDrive.
-
The Transcribed Filesfolder in OneDrive will open.
-
Find your recording, so select Actions > Share and add the email address of the person you desire to share the recording with.
-
As well share the Word certificate every bit usual.
-
The person that you shared both the Discussion document and sound file with will be able to open up the Discussion document, open up theTranscribepane, and interact with both the transcript and audio file.
Language availability and system requirements
-
Transcribe works with the linguistic communication you take ready as your editing linguistic communication in Office. Currently, only en-US is supported.
-
Nosotros're working to have Transcribe available in more locales and languages.
-
Transcribe requires an Internet connection.
-
Transcribe but works on the new Microsoft Edge and Chrome.
Important information near Transcribe
Transcribe is one of the Office Intelligent Services, bringing the ability of the cloud to Role apps to assist relieve you time and produce better results.
Your sound files will exist sent to Microsoft and used merely to provide you lot with this service. When the transcription is washed your audio and transcription results are not stored by our service. For more than information run across Connected Experiences in Part.
parkeryoulthalater1997.blogspot.com
Source: https://support.microsoft.com/en-us/office/transcribe-your-recordings-7fc2efec-245e-45f0-b053-2a97531ecf57
0 Response to "How to Upload an Official Transcript When I Cant Save It"
ارسال یک نظر